Run clients in your own name.
Get started in three steps. Everything else an agency does is below, one short flow at a time, with a picture of every screen.
Get started in 3 steps
Free forever. No scan, no card. You pay only for clients.
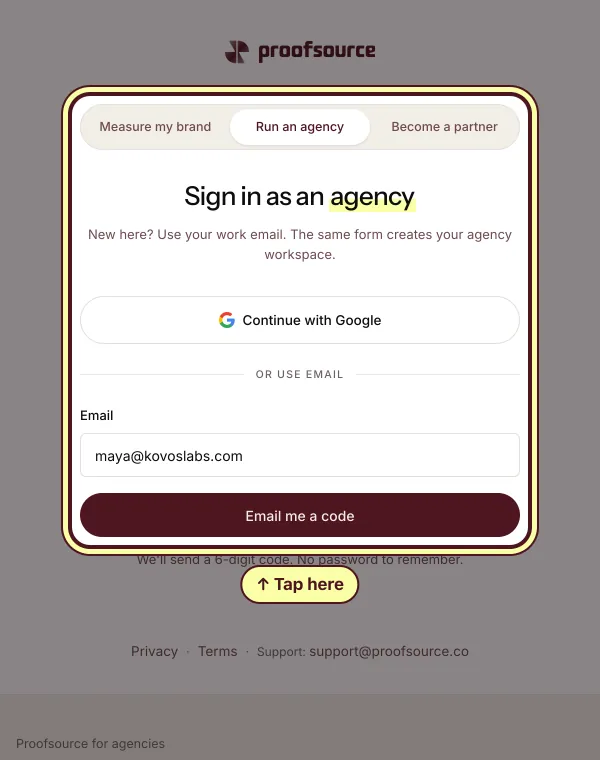
Get started, step 1: Open your free agency account
Tap Open free agency account, type your work email on the Run an agency tab, then the code we email you and your agency's name.
Get started, step 2: Add your first client
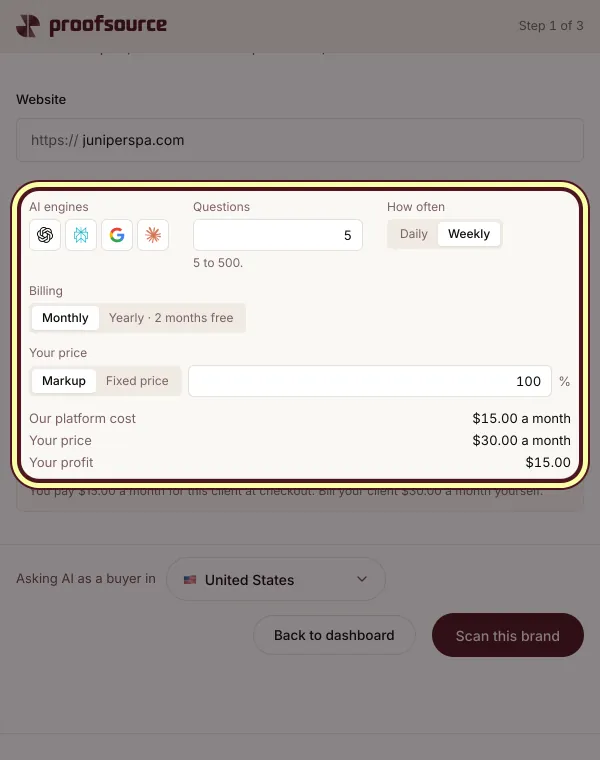
Tap Add a client, paste its link, pick its plan and your price, then pay for it or send the client its checkout link.
Get started, step 3: Put your name on it
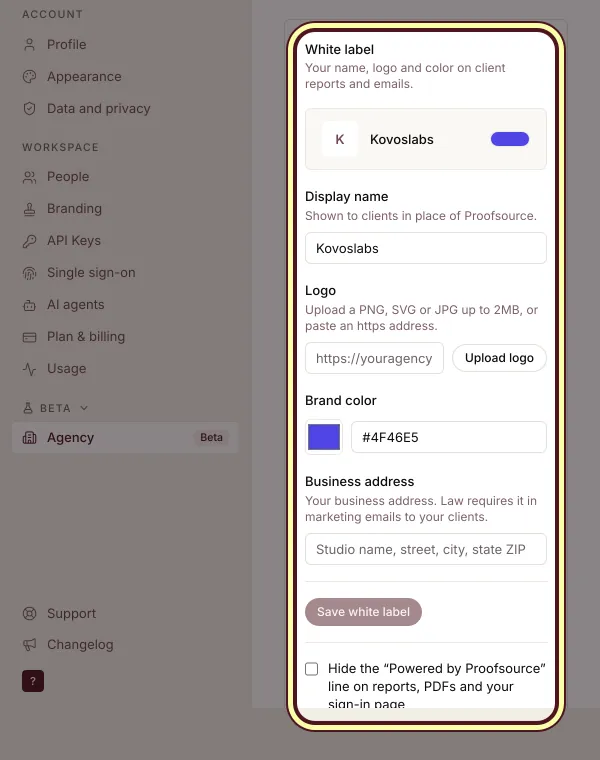
In Settings, Agency, White label, add your name, logo, brand color and business address, then tap Save white label.


Everything else, step by step
Pick what you want to do next.
Pitch a prospect, free
A free pitch scan of a prospect's brand, and a report in your name to show them.
Pitch a prospect, free, step 1: Open Prospects
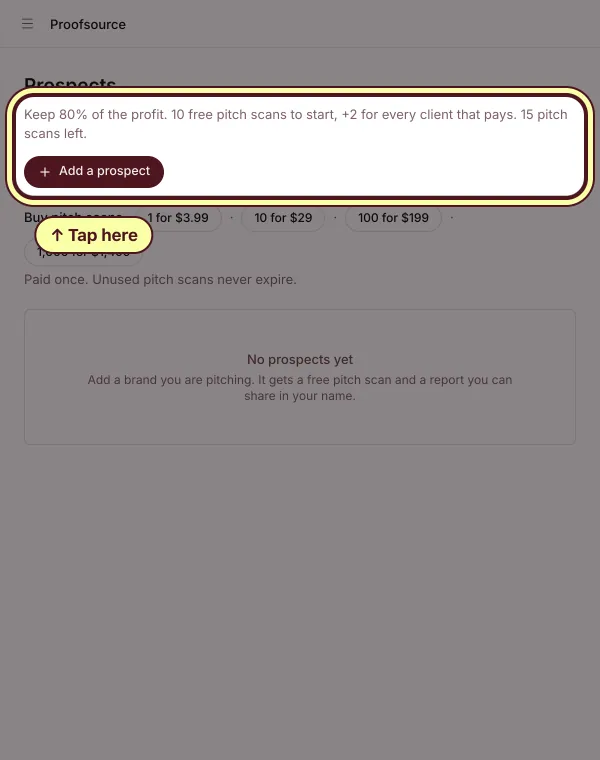
Tap Prospects, then Add a prospect. Each prospect uses one free pitch scan. You start with 10, and get 2 more for every client that pays.
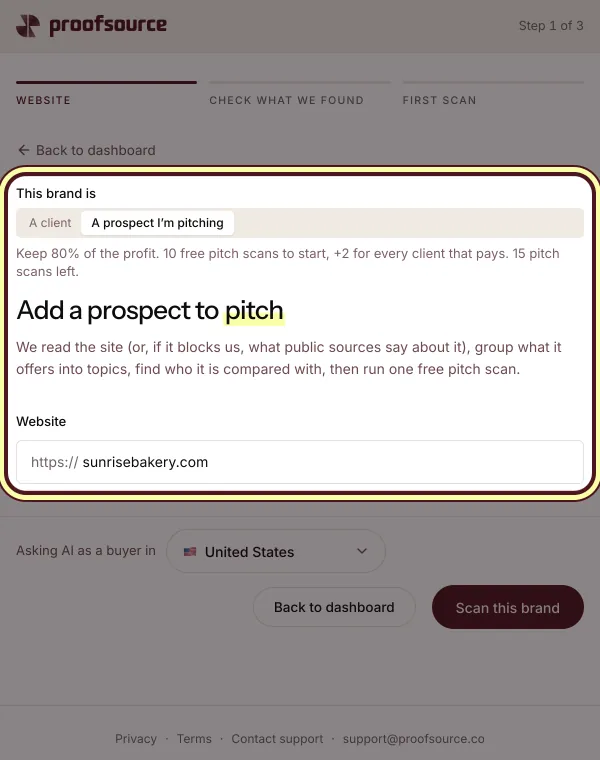
Pitch a prospect, free, step 2: Type the prospect's website
Under This brand is, pick A prospect I’m pitching. Paste their link and tap Scan this brand. The scan shows what AI says about them, and who it names instead.
Pitch a prospect, free, step 3: Send the pitch report in your name
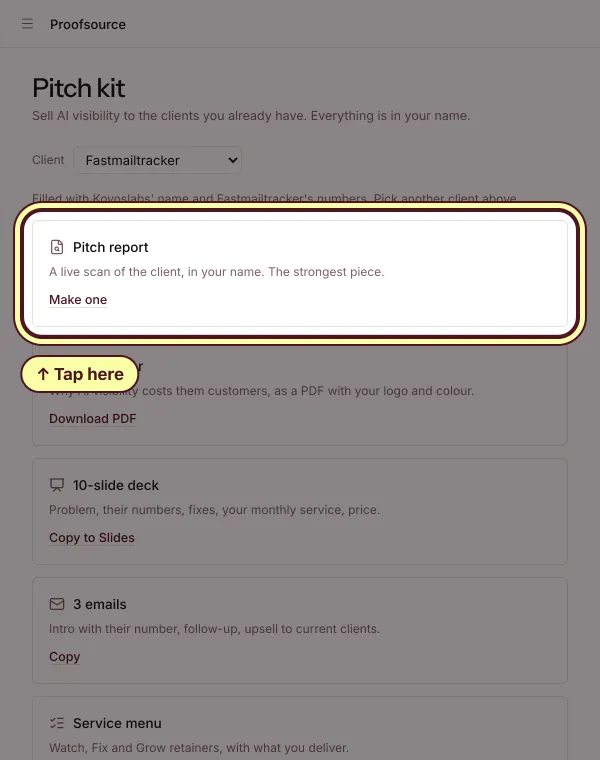
Tap Share on the prospect's row, or open Pitch kit and tap Make one under Pitch report. It is a live scan of the brand, with your name on it.
Pitch a prospect, free, step 4: Need more pitch scans? Buy a pack.
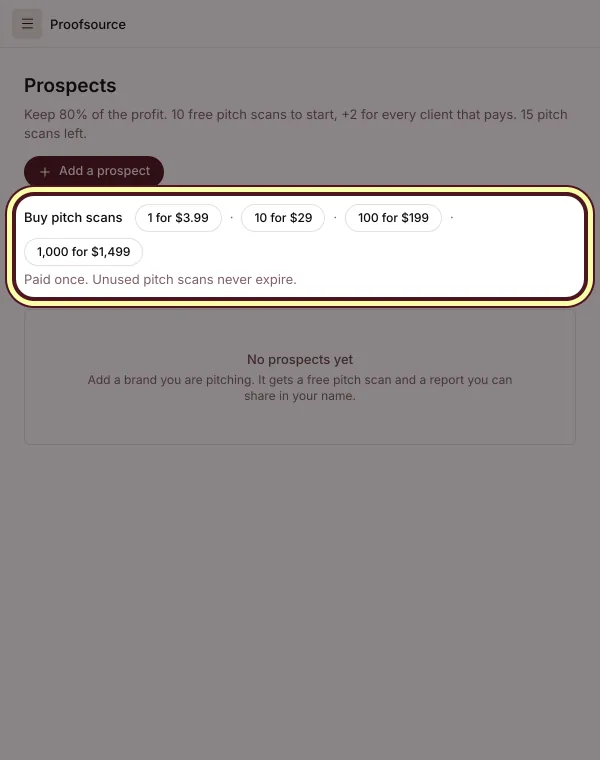
On Prospects, under Buy pitch scans, tap a pack. It is paid once, and unused pitch scans never expire.


Turn a prospect into a client
When a prospect says yes, its pitch scan becomes day one of its history.
Turn a prospect into a client, step 1: Tap Make client, then pick its plan and price
On Prospects, tap Make client on the prospect's row. Pick the plan: engines, questions, how often. Then set your price, as a Markup or a Fixed price. You see our platform cost and your profit as you type.
Turn a prospect into a client, step 2: Send the checkout link
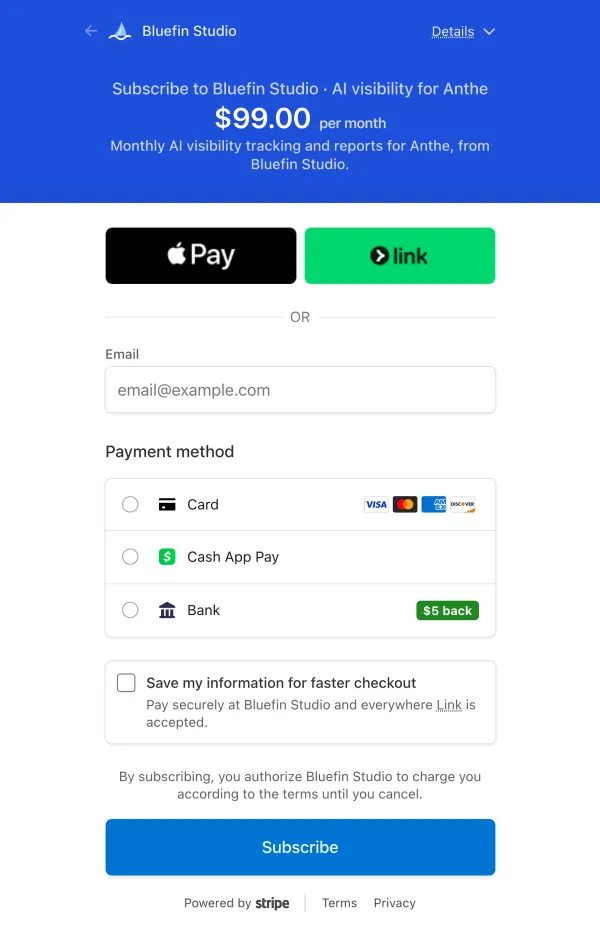
Tap Copy checkout link and send it to the client. It pays on a checkout in your name, at your price, and its scan starts once it pays. If you pay for the client yourself, it joins your bill instead.

Add many clients at once
A whole list of clients, or every location of a chain, on one plan and one price.
Add many clients at once, step 1: Paste their websites
Tap Add many clients. Paste websites, one per line, or tap Upload CSV. Each one gets a first scan.
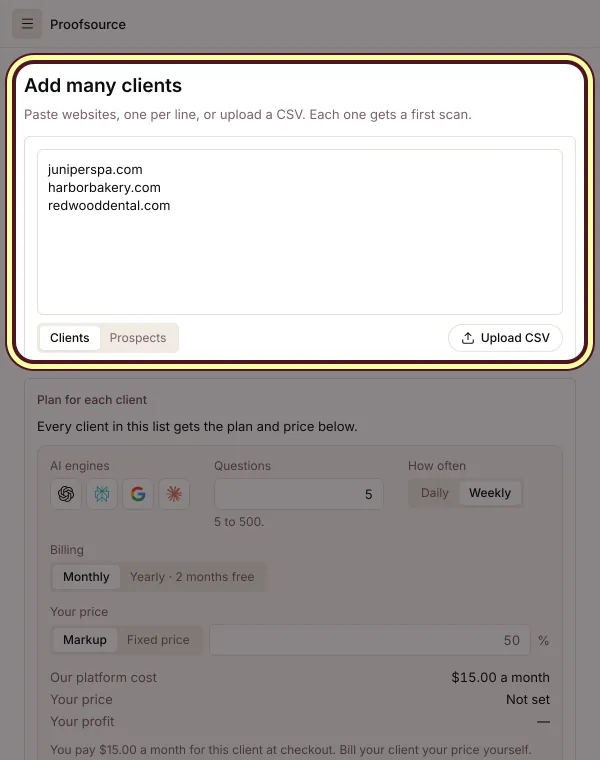
Add many clients at once, step 2: Pick one plan and one price for the batch
Under Plan for each client, pick the plan. Then enter your price for these clients: a markup, or a fixed price of at least our platform cost. Then tap Add, which counts them: Add 3 clients.
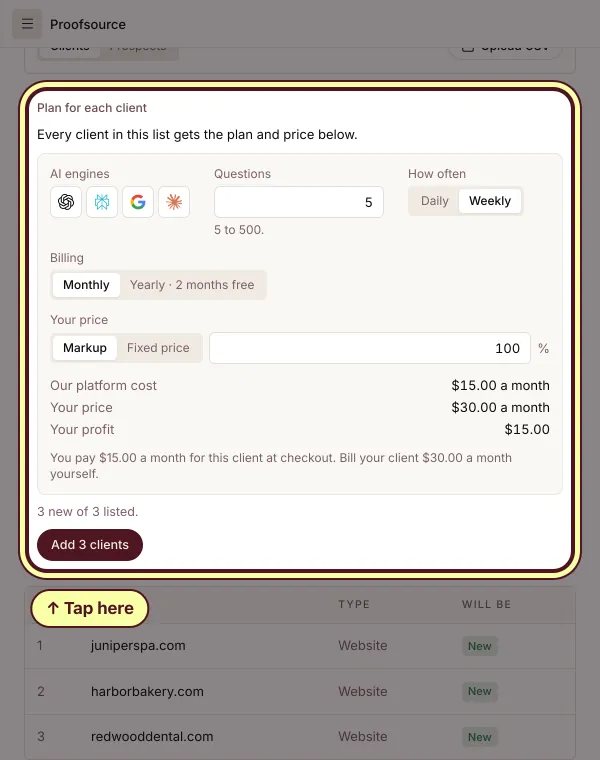
Add many clients at once, step 3: Pay, or copy each checkout link
Each row then shows how it gets paid: Pay for this client if you pay, or Copy checkout link to send to the client. Every client is also in Plan & billing, with Pay now beside any you pay that is still unpaid.


Set your price and get paid
Your price on every client, and the way each one pays.
Set your price and get paid, step 1: Set a markup or a fixed price
On each client's plan, pick Markup or Fixed price. You see our platform cost, your price and your profit as you type. Your price must be at least our platform cost.
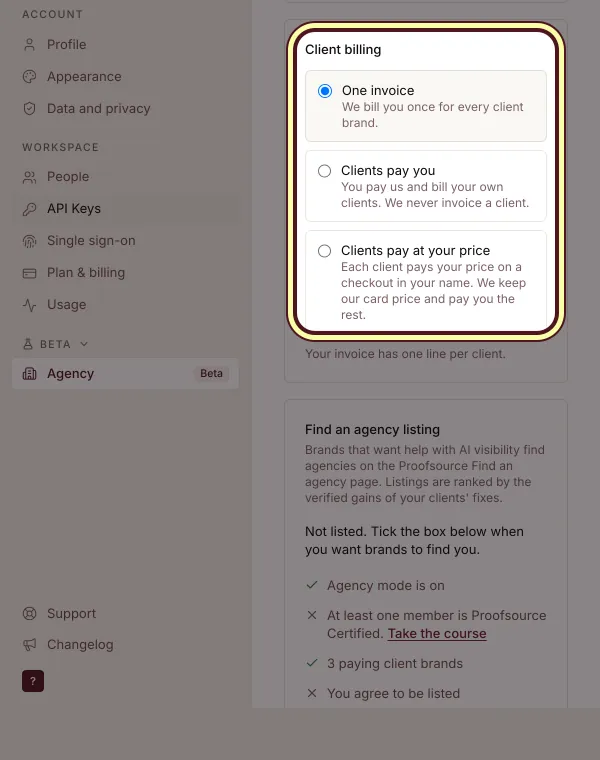
Set your price and get paid, step 2: Pick how clients pay
In Settings, Agency, under Client billing, pick One invoice or Clients pay you: you pay the platform cost and bill clients yourself. Or Clients pay at your price: each client pays you on a checkout in your name, and we keep the platform cost plus 20% of your profit.
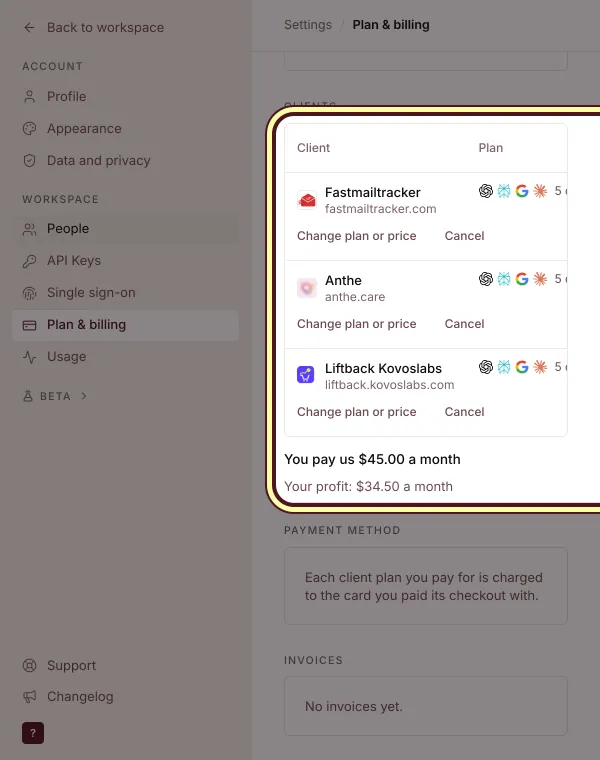
Set your price and get paid, step 3: See every client's money in one table
Open Settings, Plan & billing. Each client shows its plan, who pays, our cost, your price and your profit. Change a plan or price there, and tap Pay now for a client you pay that is still unpaid.

White label everything
Reports, emails, client logins and sign-in pages in your name, on your own address.
White label everything, step 1: Add your name, logo and color
In Settings, Agency, under White label, type your display name, tap Upload logo (a PNG, SVG or JPG up to 2MB), pick your brand color and add your business address. Tap Save white label.
White label everything, step 2: Hide Powered by Proofsource
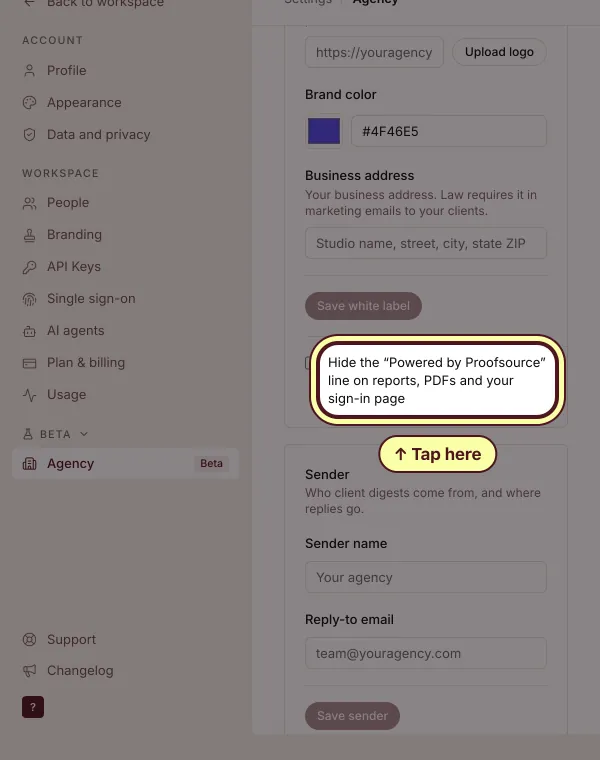
Tick Hide the “Powered by Proofsource” line on reports, PDFs and your sign-in page. Clients then see only your name.
White label everything, step 3: Send client emails from your own domain
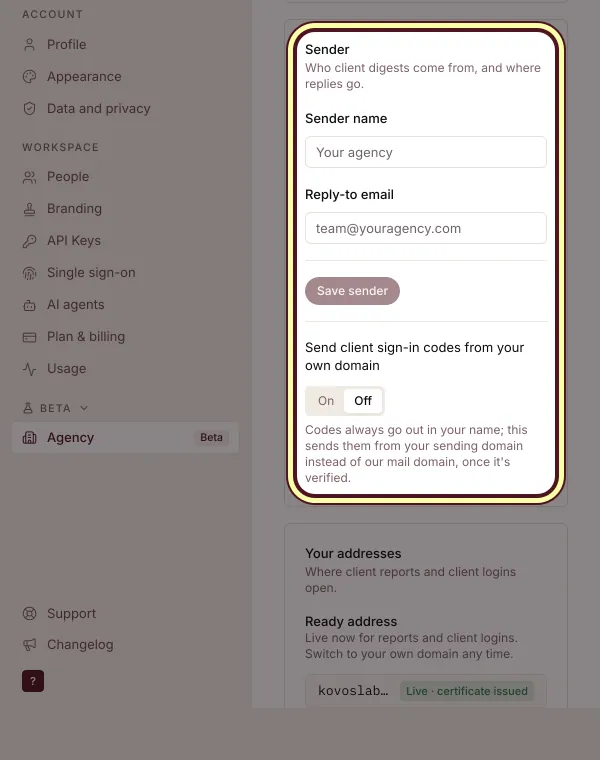
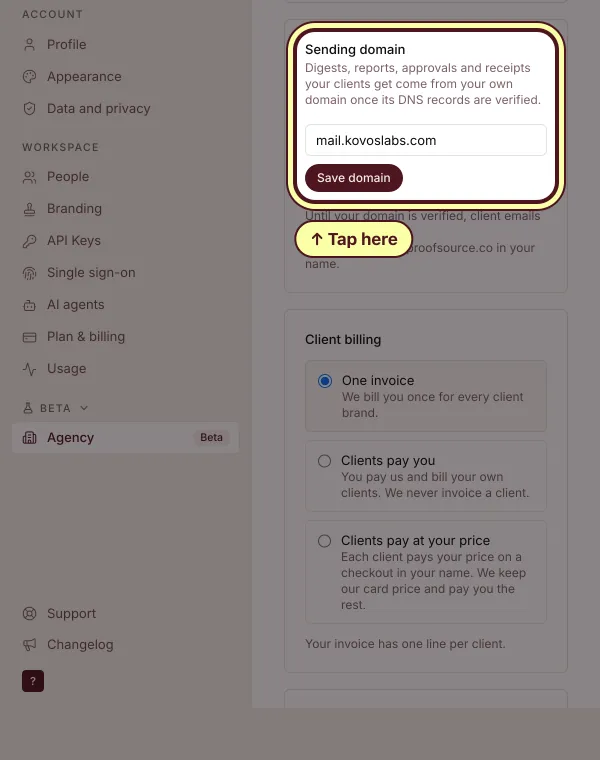
Under Sender, type the sender name and reply-to email. Under Sending domain, type a subdomain like mail.youragency.com, tap Save domain, add the records at your DNS provider and tap Verify now.
White label everything, step 4: Use your ready address, or your own domain
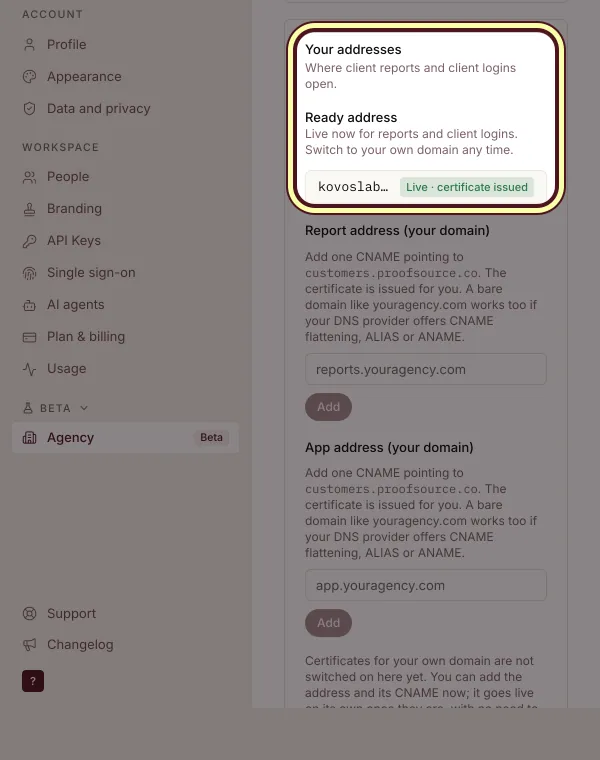
Under Your addresses, your ready address, youragency.proofsource.co, is live at once for reports and client logins. Or type your own domain and tap Add.


Give clients their own login
Each client signs in to see only its own brand, read-only, in your name.
Give clients their own login, step 1: Invite the client
In Settings, People, under Invite by email, type the client's email. Under Invite as, pick Client login, choose the client, and tap Send invite. The link works for 7 days.
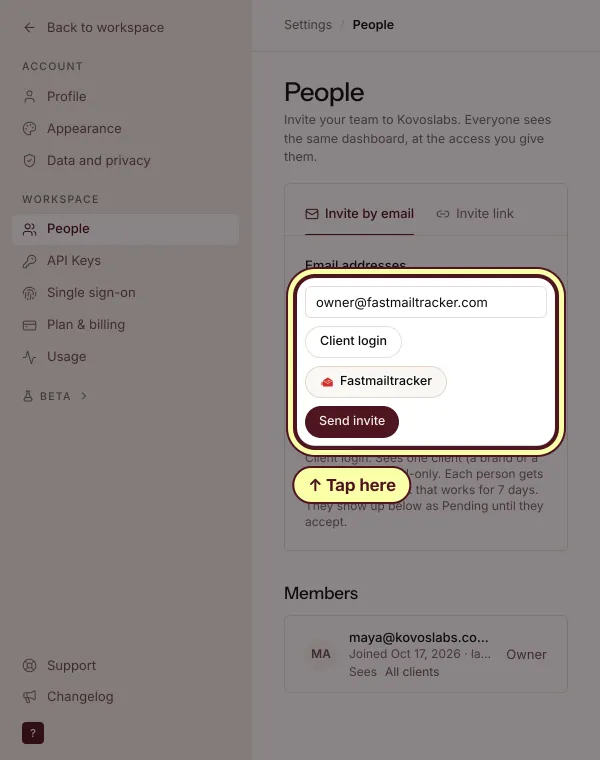
Give clients their own login, step 2: Sign-in codes come from you
Codes always go out in your name. Turn on Send client sign-in codes from your own domain to send them from your sending domain once it is verified.
Give clients their own login, step 3: Turn on single sign-on
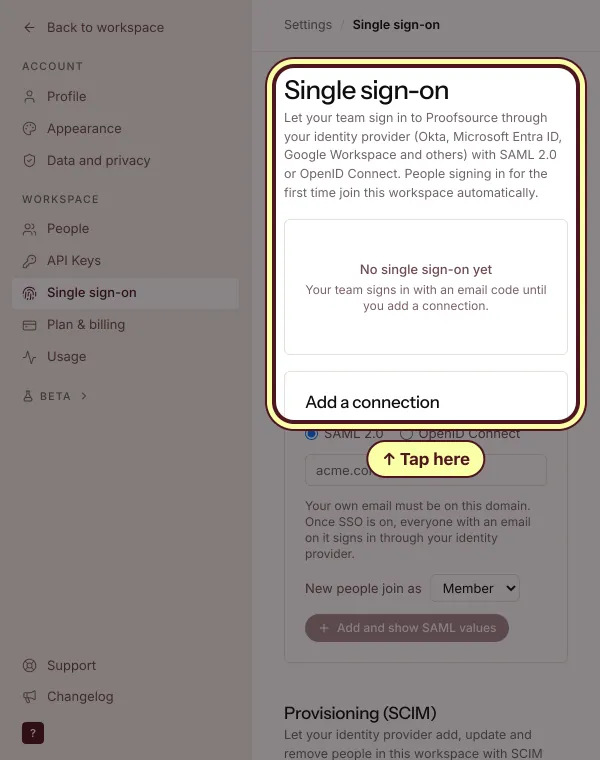
In Settings, Single sign-on, tap Add a connection. Type the email domain, pick who new people join as, and add your identity provider's details.


Portfolio and client view
Your agency level for every client at once, and each client's full dashboard one tap away.
Portfolio and client view, step 1: See every client on Portfolio
Portfolio is your agency's home. Every client shows side by side, with how often AI names it. Tap a client to open it.
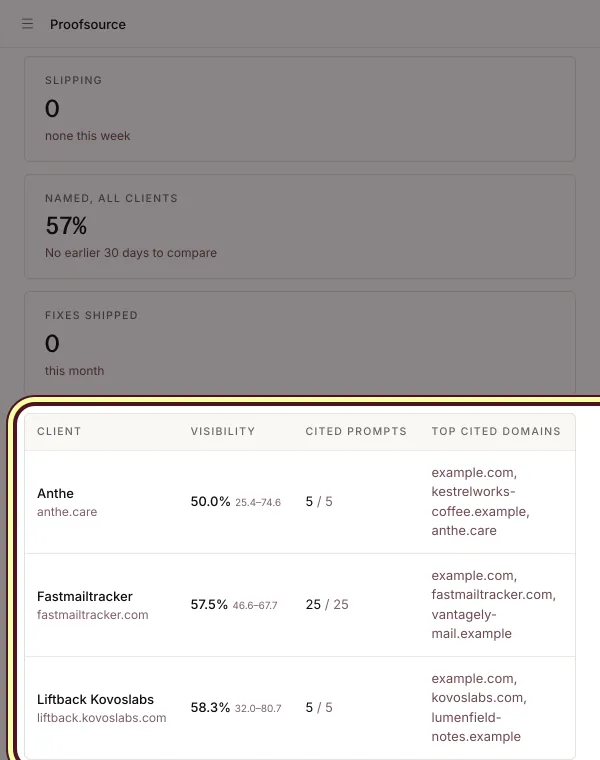
Portfolio and client view, step 2: Open a client, and go back
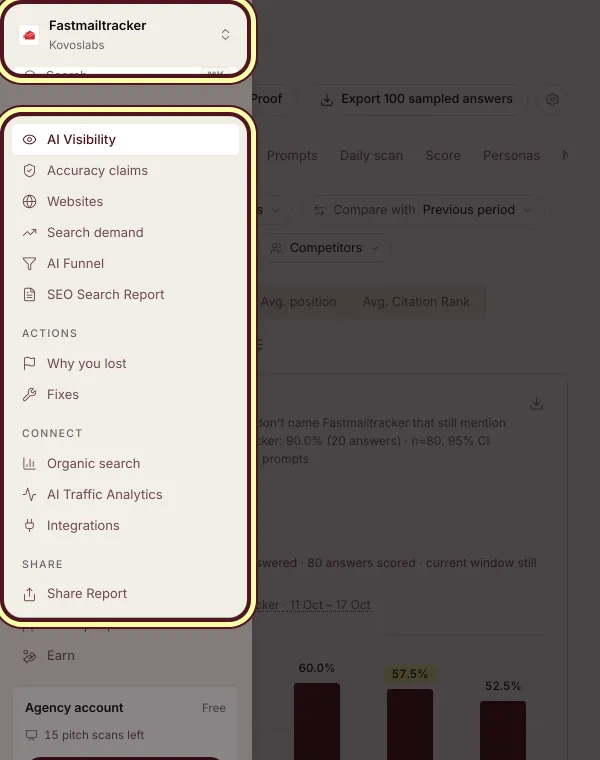
Tap a client on Portfolio, or pick it in the switcher. You get that brand's full dashboard. The switcher names the client and your agency, so one tap takes you back.


Use the pitch kit
Everything you need to sell AI visibility, filled with your name and a client's real numbers.
Use the pitch kit, step 1: Open Pitch kit and pick a client
Tap Pitch kit and pick a client or prospect at the top. Every piece fills in with your name and that brand's numbers.
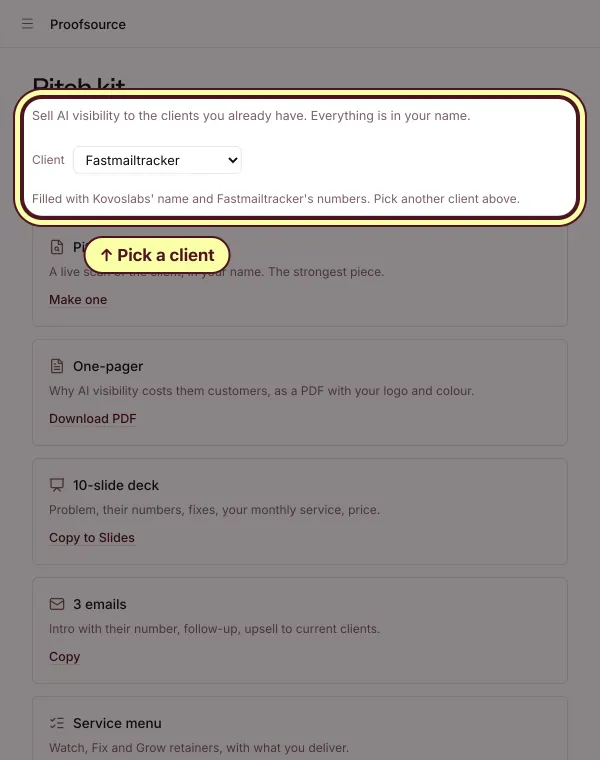
Use the pitch kit, step 2: Send the piece you need
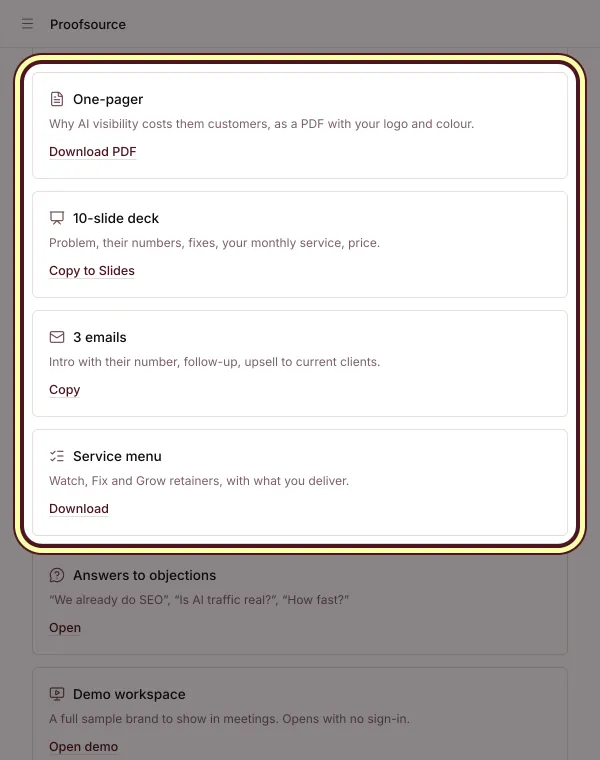
Pitch report, One-pager PDF, 10-slide deck, 3 emails, Service menu, Answers to objections, a Demo workspace that opens with no sign-in, and a Joint case study once a client moves.


Get certified and earn more
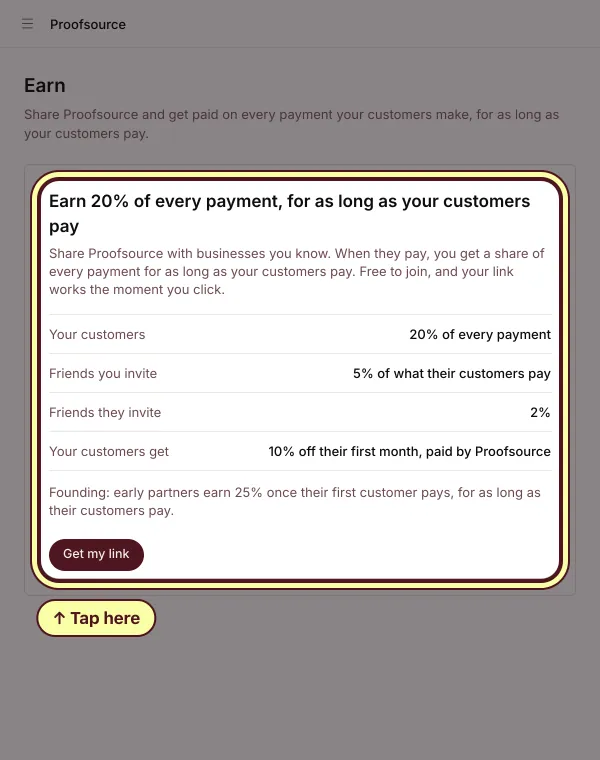
A certificate for your team, a listing new brands find, and 20% of every payment from brands you refer.
Get certified and earn more, step 1: Take the course
Tap Get certified. Read six short lessons, then tap Take the quiz: 15 questions, 12 right to pass.
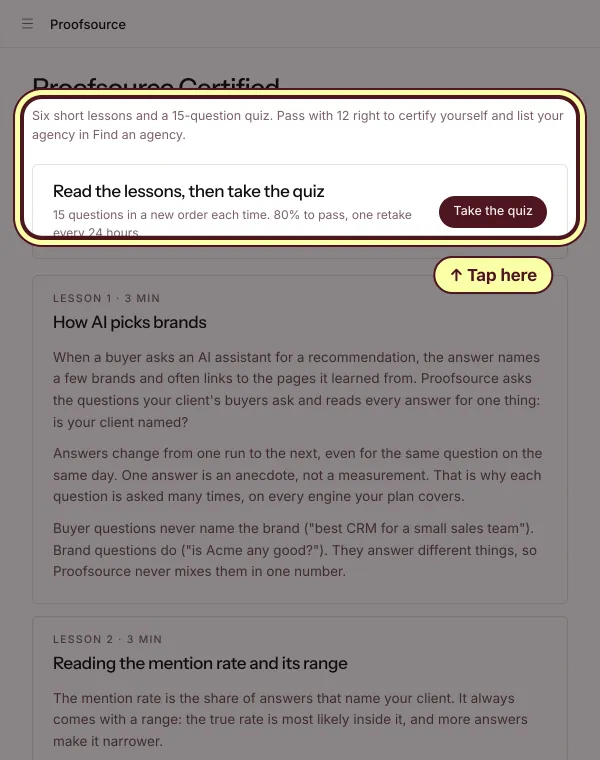
Get certified and earn more, step 2: Get listed in Find an agency
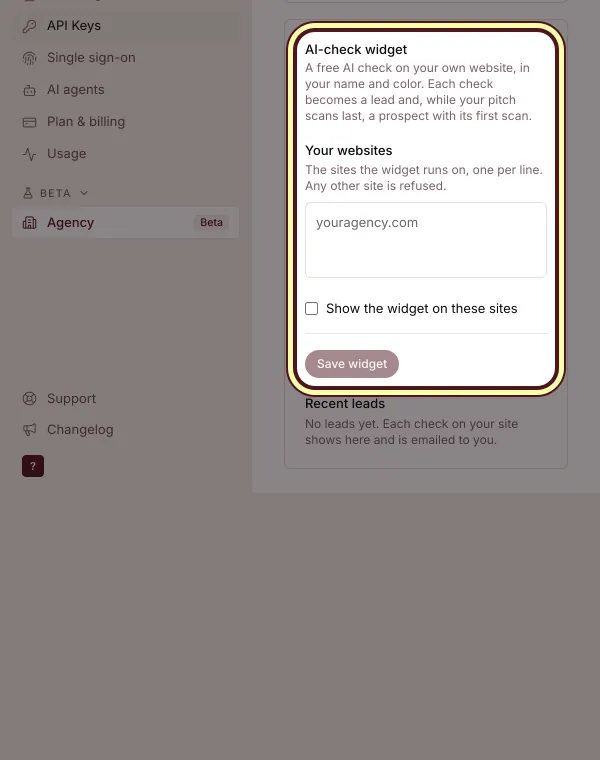
In Settings, Agency, list your agency on Find an agency, and put the free AI-check widget on your own site. Every check becomes a lead.
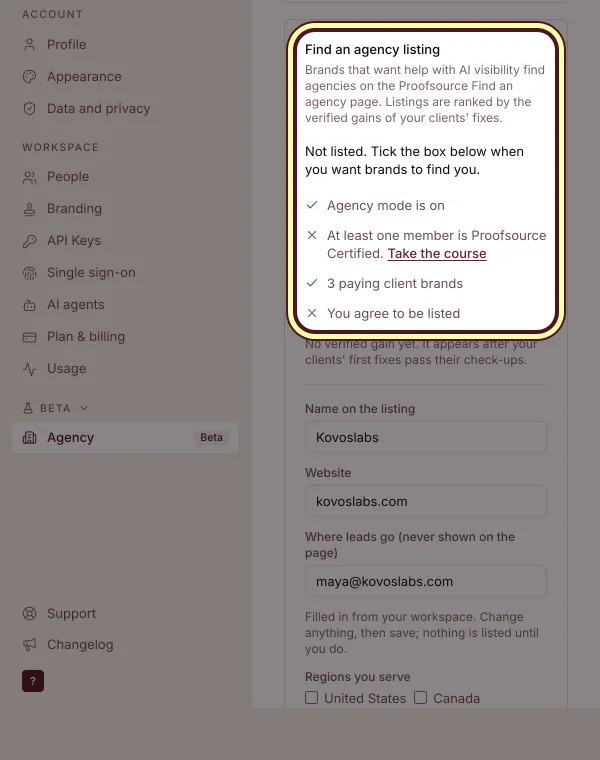
Get certified and earn more, step 3: Refer brands you don't run
Tap Earn, then Get my link, and share it. When a brand you send pays, you get 20% of every payment, for as long as it pays.


Questions
Is the agency account free?
Yes, forever, with no trial. You pay only for clients. Unlimited clients and team members.
What is a client?
One brand. Each client has its own plan, paid from its first scan. Only prospects get a free scan.
How many free pitch scans do I get?
10 to start, and 2 more for every client that pays. They never expire. Need more? Buy a pack on Prospects.
What do you keep?
The platform cost of each client, which is its plan's price on our pricing page. When clients pay your price on a checkout in your name, we also keep 20% of your profit.
Kovoslabs and its clients are a demo agency on our own test stack. Your screens show your names. Read the full agency terms, see what an agency account includes, or find an agency.